Introduction
The QnA Maker is intended to behave as a reusable IP that can be used to deploy a customized QnA Bot Service onto any Azure subscription for free. It just takes about 10 minutes to have your personalized QnA Bot up and running.
Project Details
This project has 3 parts:
- Backend where the QnA Knowledge Base service is hosted for which we utilize Azure.
- GitHub Repository FAQ files are utilized to update the QnA service knowledge base automatically.
- Frontend where you can interact with the QnA service, which in our case in GitHub Issues Bot & Azure Bot Service
The Architecture is defined in the diagram below:
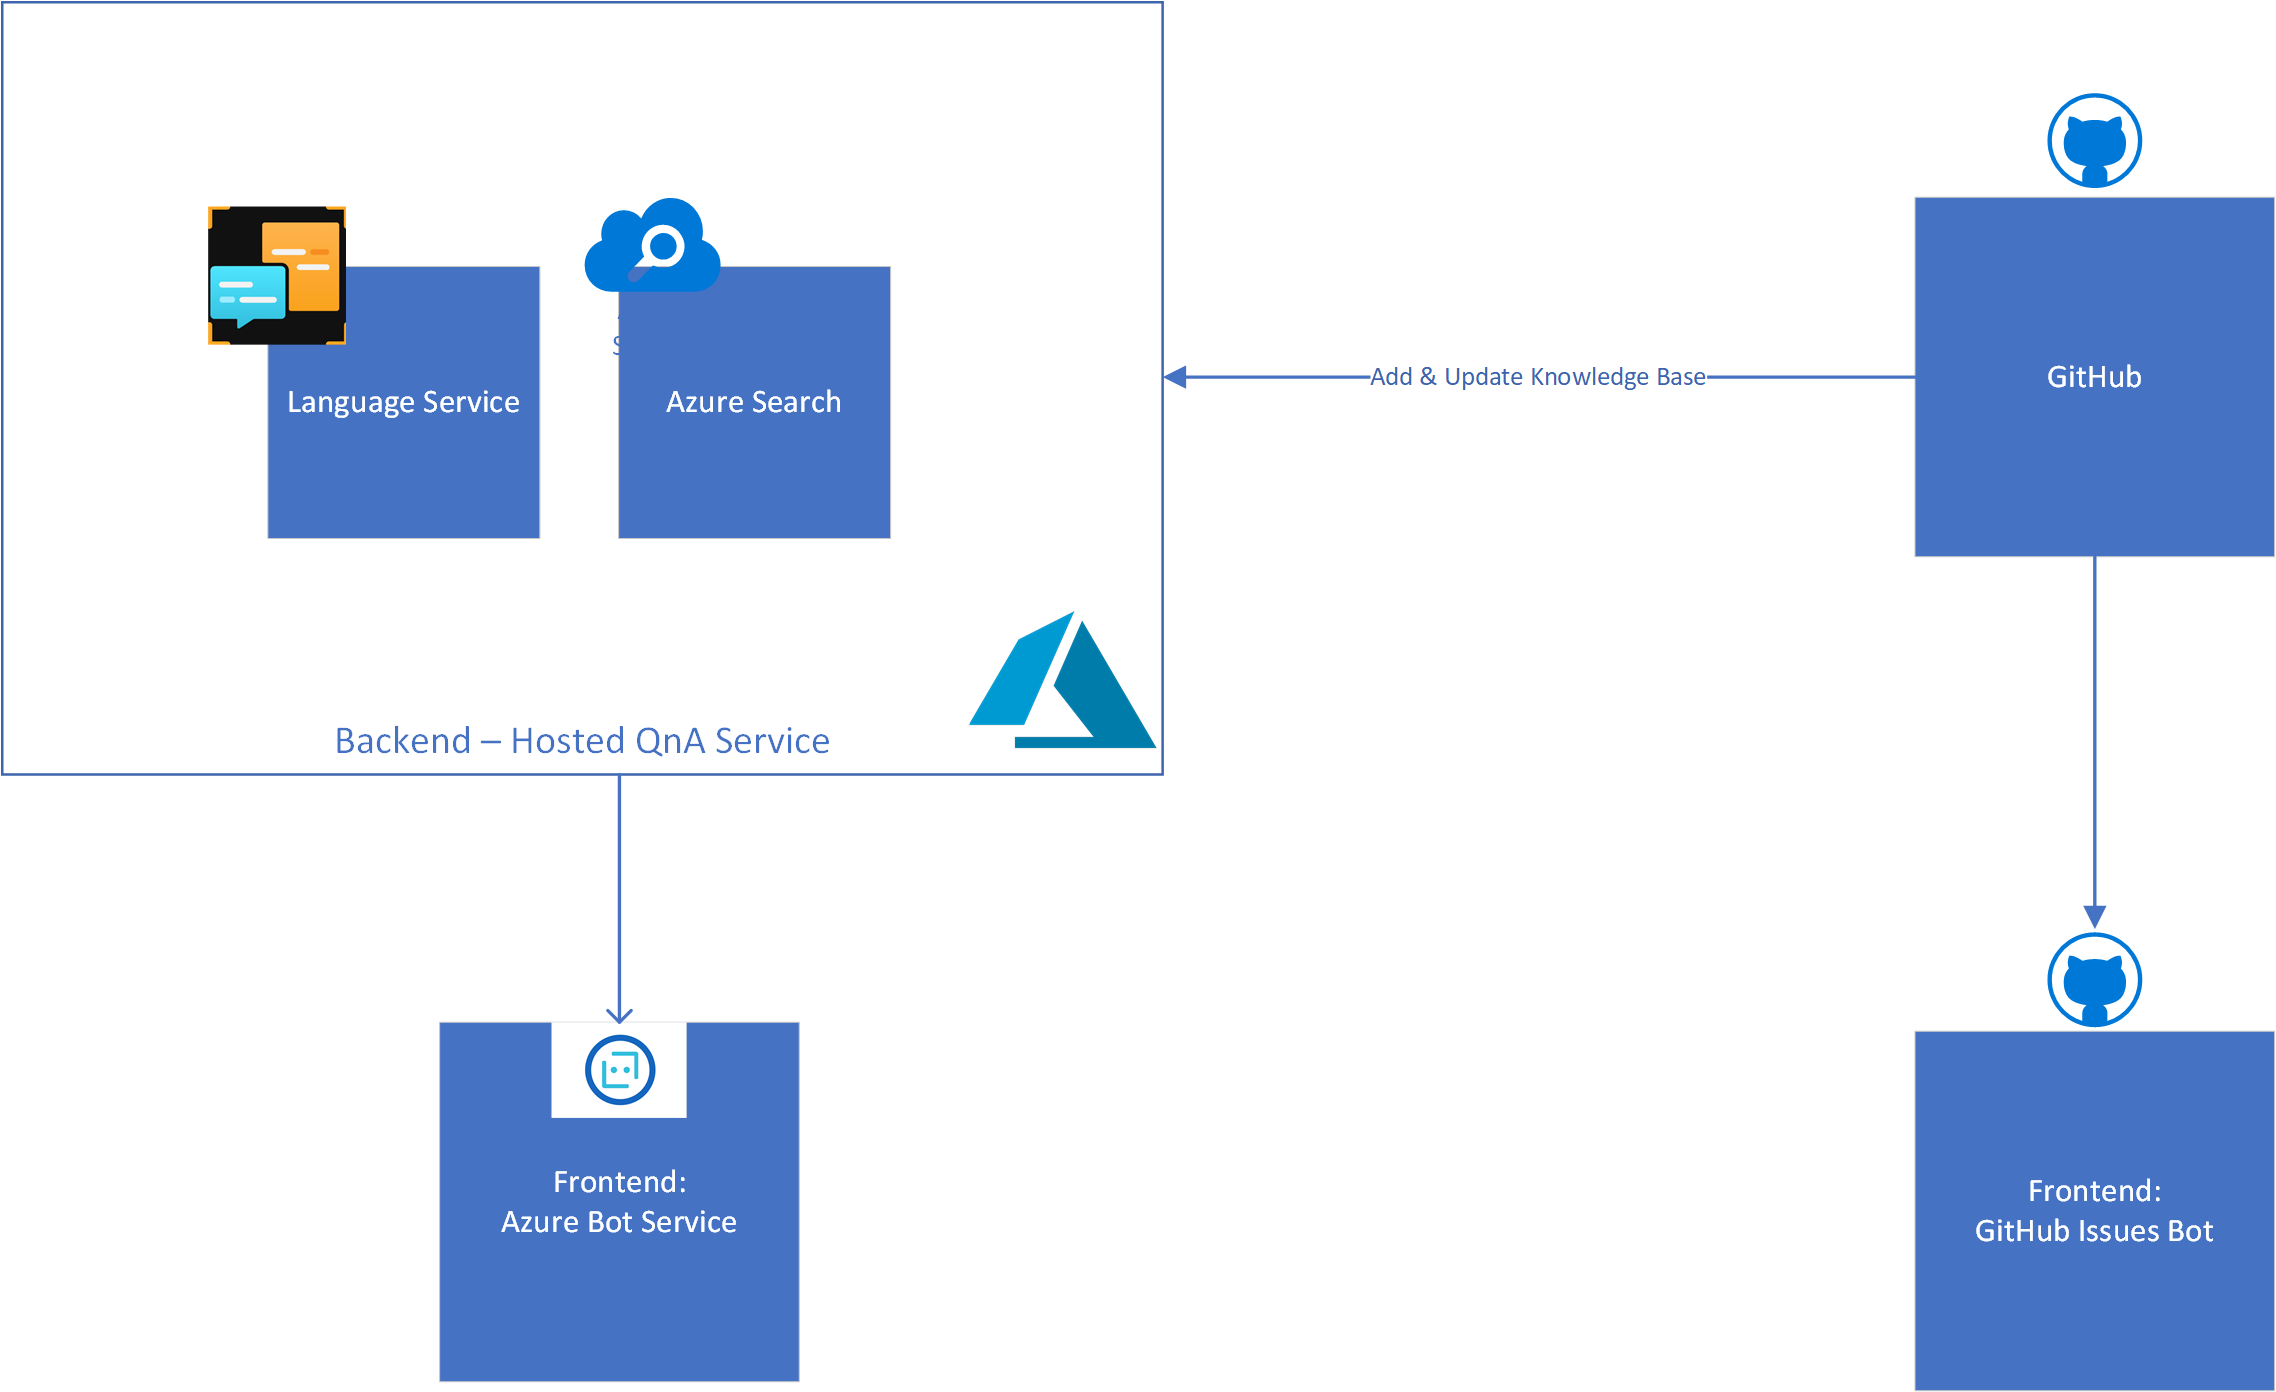
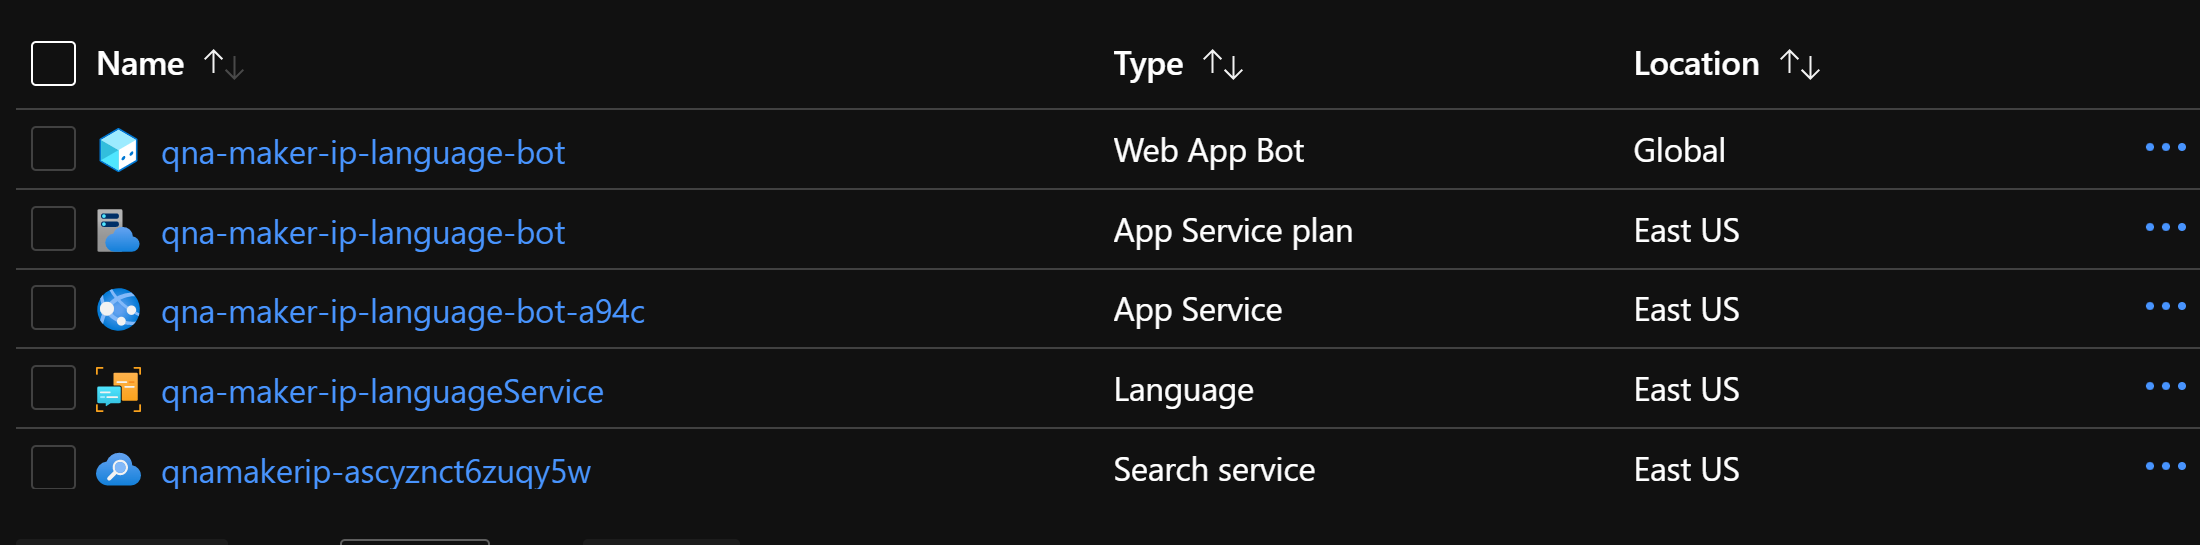
Following Azure Resources are being utilized:
- Azure Language Service - Store Knowledge Base
- Azure Search Service - Question and Answer search
- Azure Bot Service - Frontend for QnA
- Azure App Service Plan & App Service - Hosting the bot
QnA Backend
The Backend language service and knowledge base initialization is automated using ARM templates and powershell scripts. The QnA-Infra-Deploy workflow is responsible for deploying this onto Azure.
The deploy.json ARM Template deploys the language service and search service. As an output of this ARM template we get the subscription key to the language service which we store as GitHub secret to be used in other workflows.
The createLanguageProject.ps1 script is used to initialize the knowledge base with predefined witty chit-chat QnA pairs.
With this, now we have our default QnA service up and running.
Next step is to add customized Question and Answer pairs to this knowledge base. For this we have created a GitHub action QnA-KB-Deploy, which is responsible for picking up all the md files within the FAQs folder and automatically deploying all the question answer pairs withing these files to the knowledge base.
These markdown files expect a certain format to be picked up by the automated script.

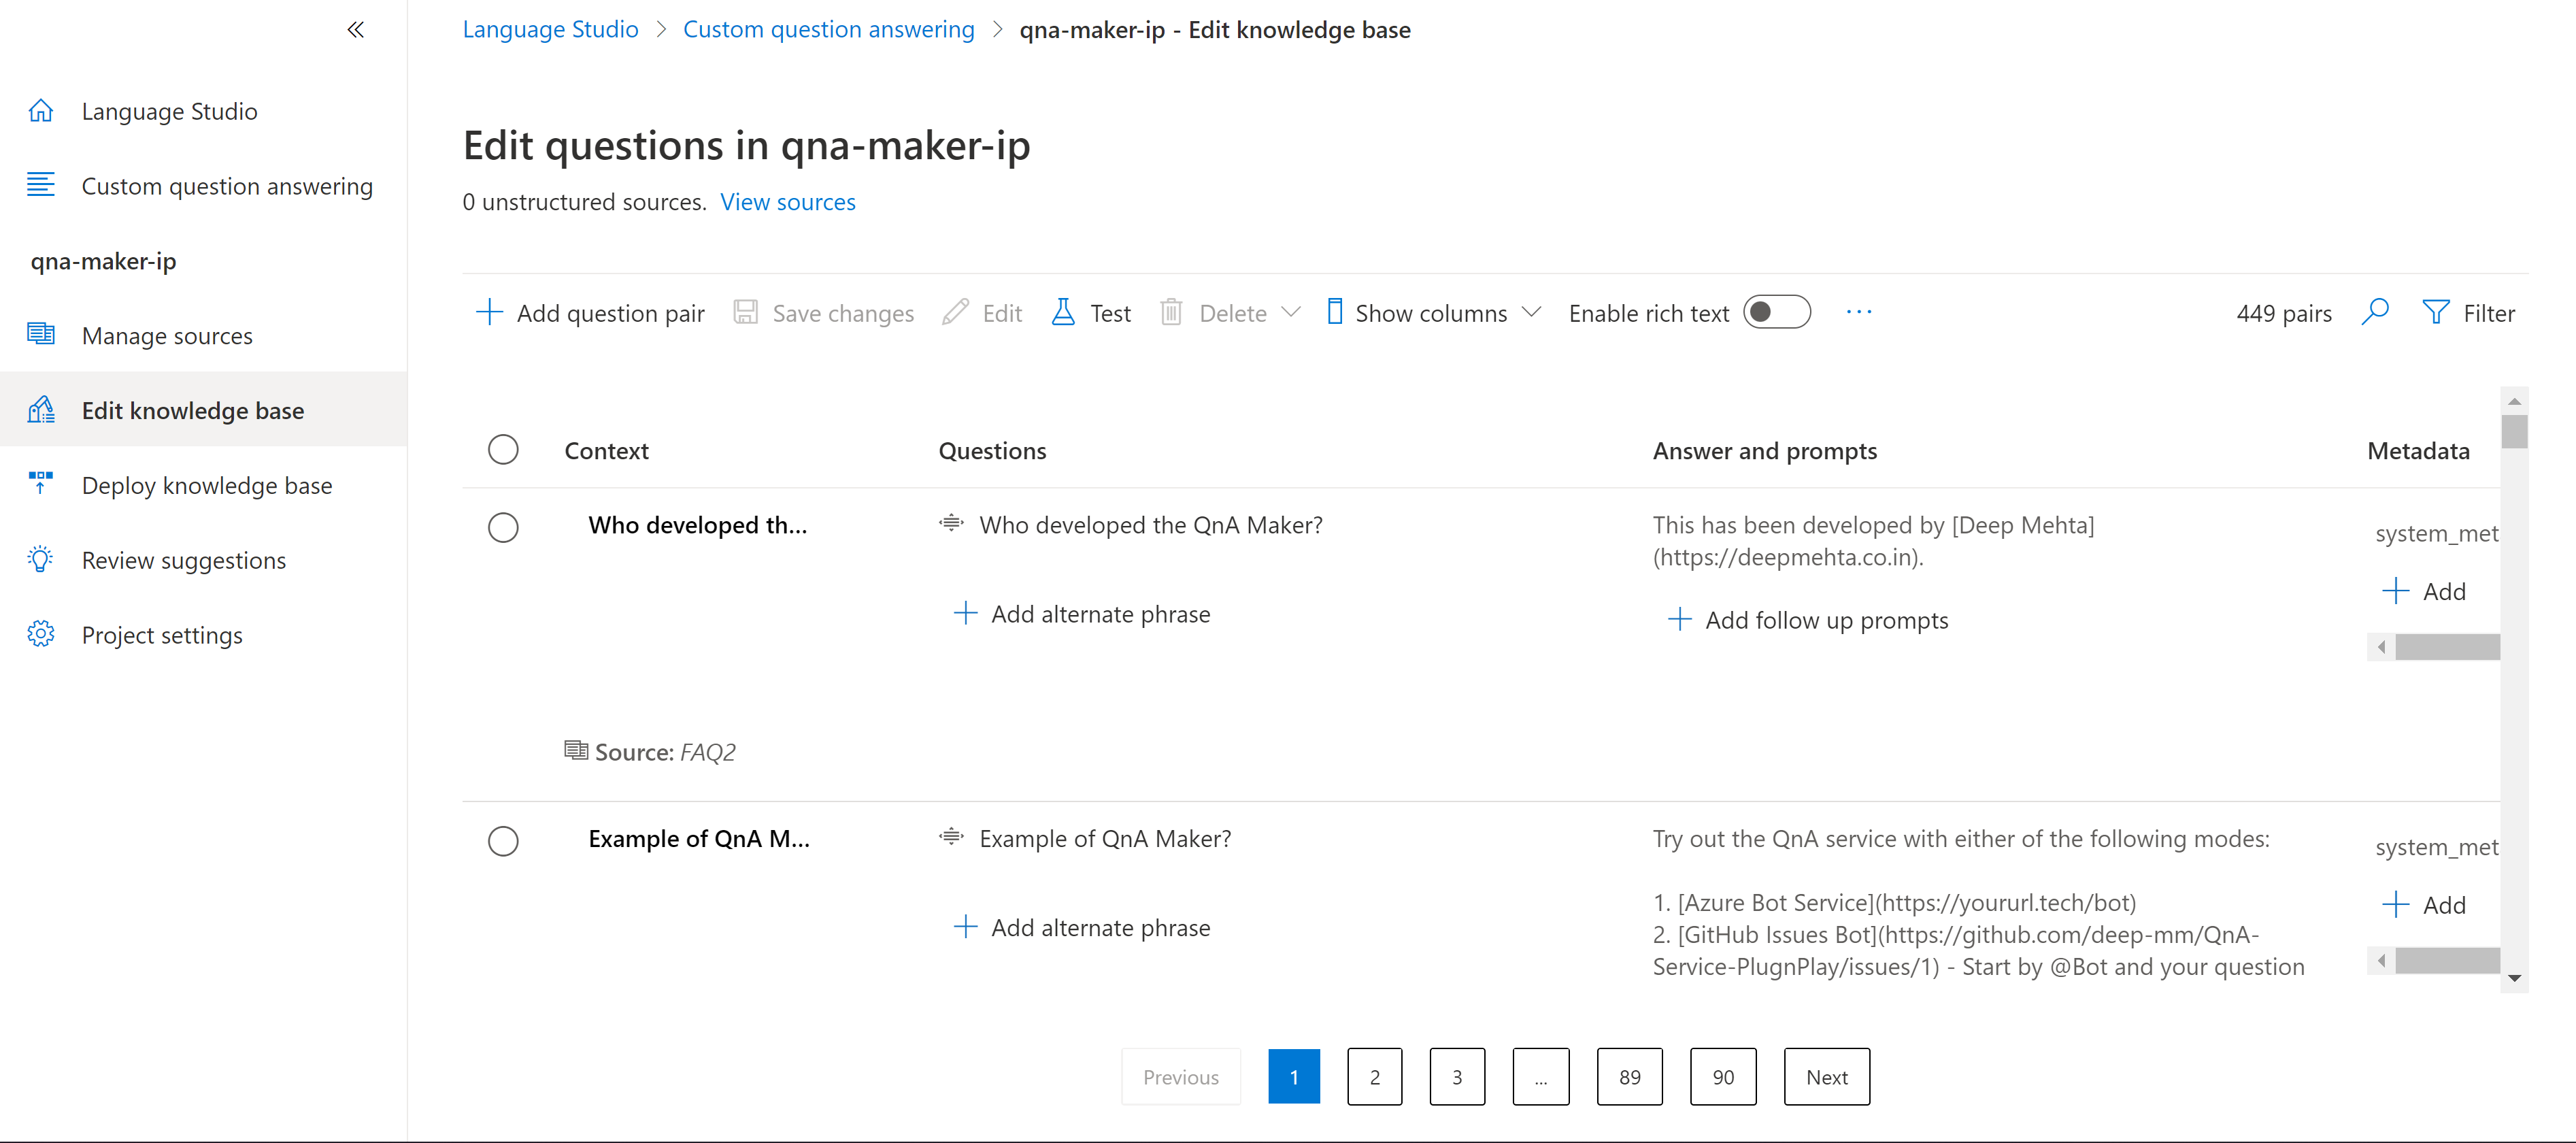
The knowledge base can be explored and tested in the Language Studio.
QnA Frontend
The frontend here is of 2 different types:
-
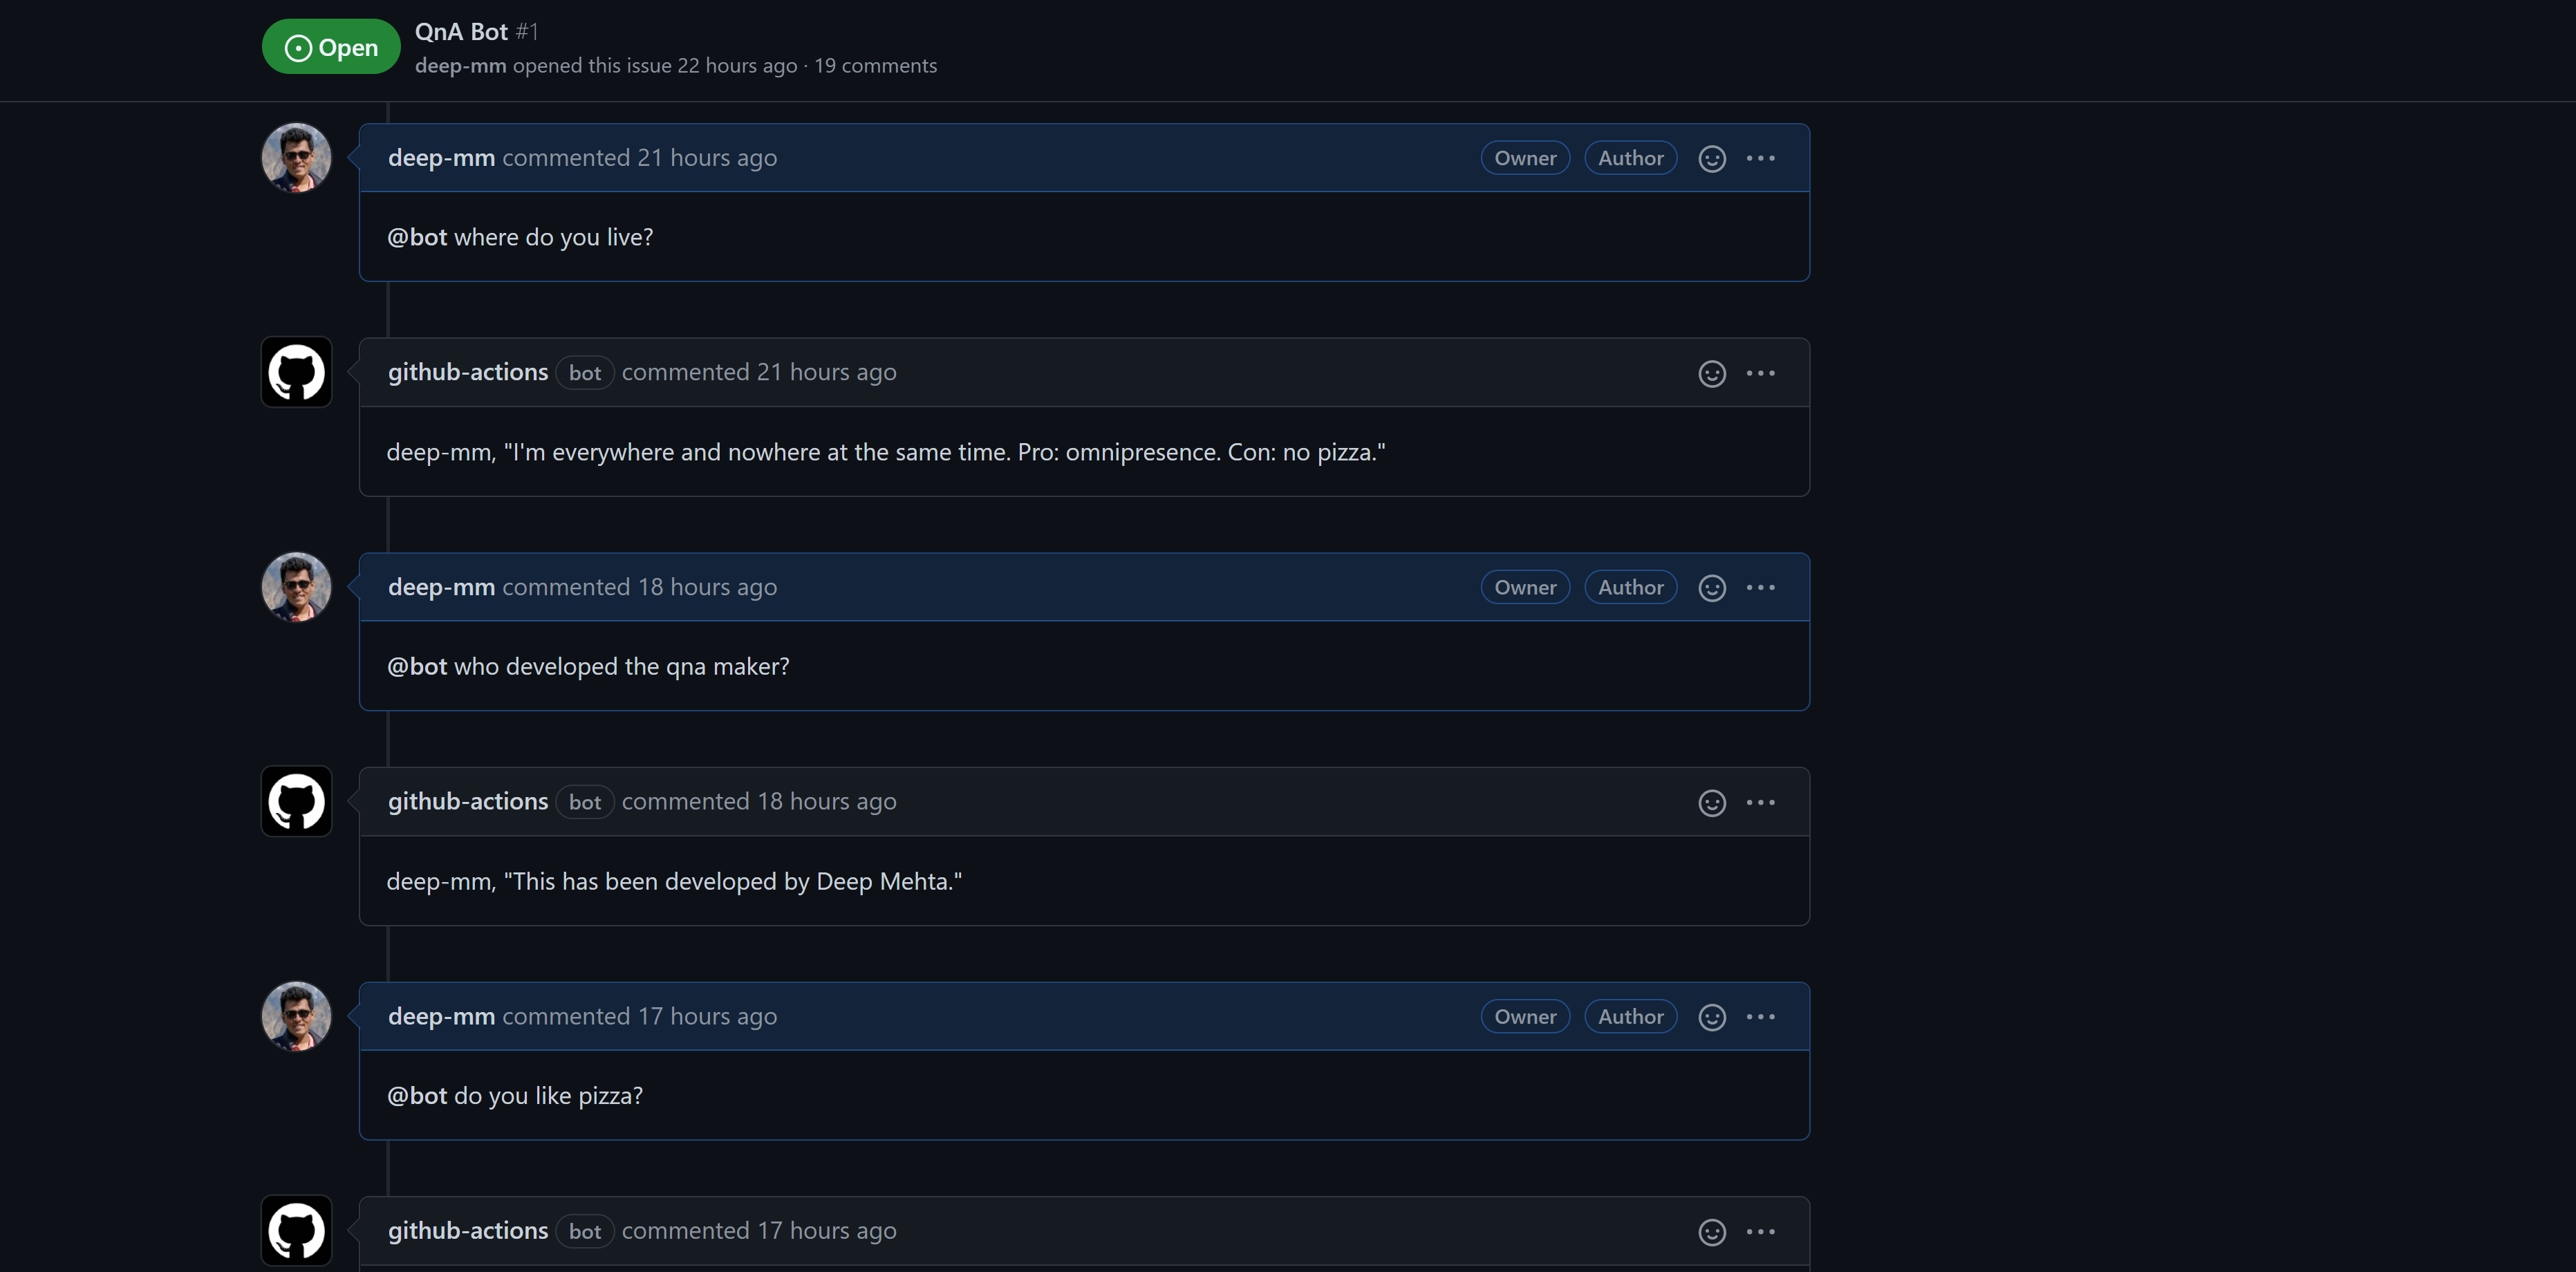
GitHub Issues Bot (Doesn’t require any additional infrastructure) The github workflow GH-Issue-Bot continuously listens for issue comments, and if there is a comment starting with @bot, it calls the QnA API and gets the answer and then replies to that issue. The list of language service REST API can be found here Question Answering APIs.
-
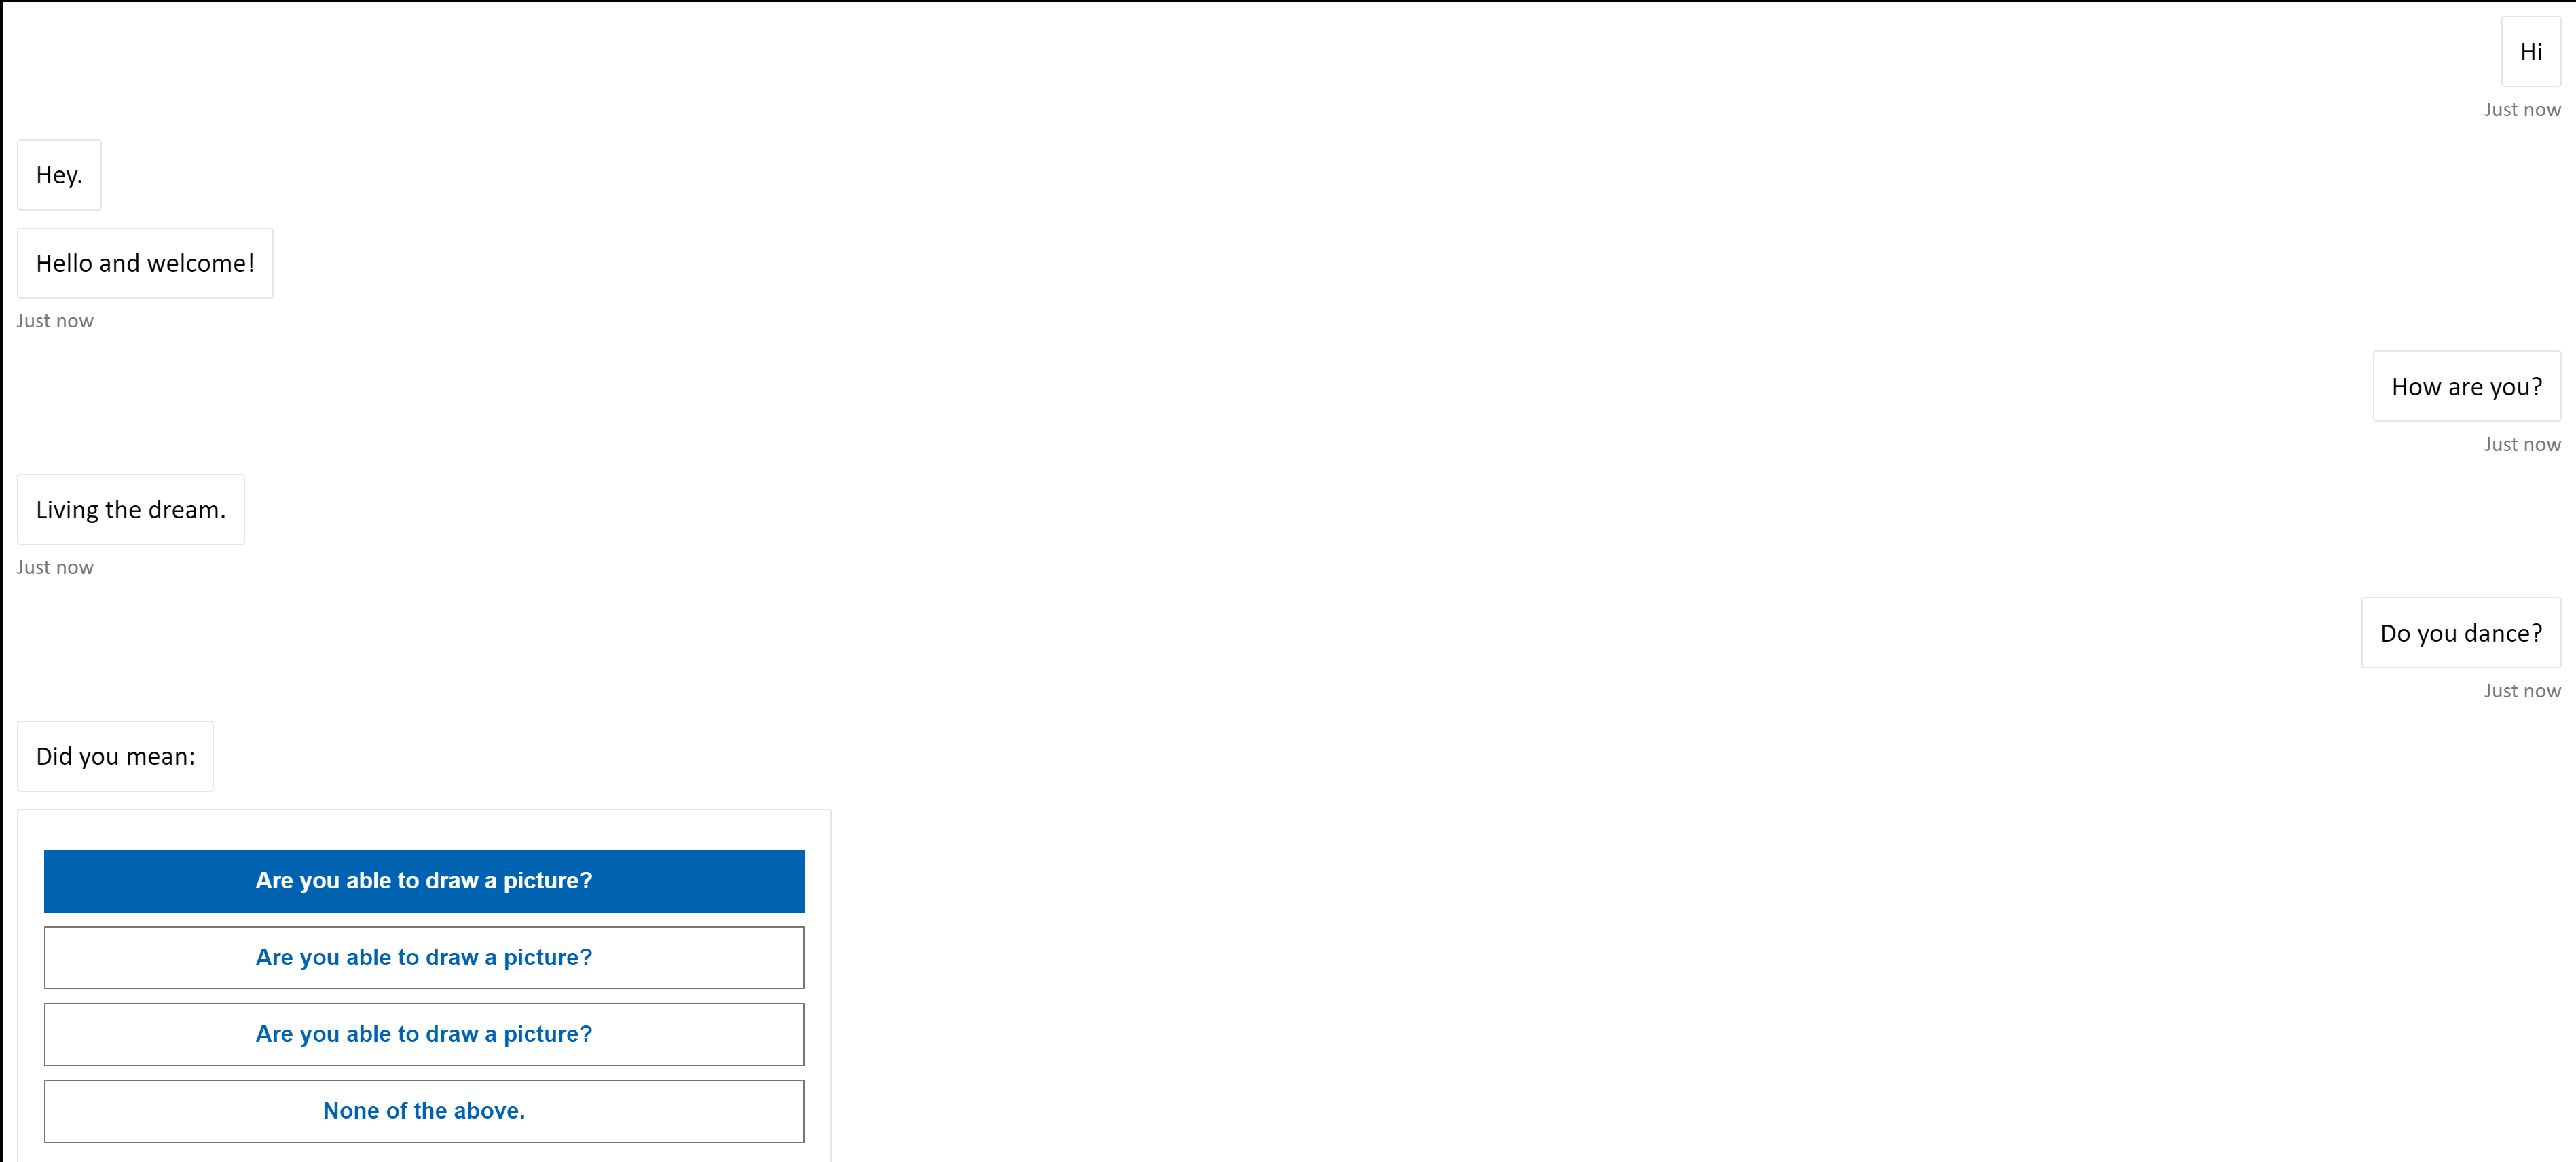
Azure Bot Service (Required infrastructure) The Azure Bot service is an easy to deploy service and can be used across various channels including Web chat, Microsoft Teams, Twilio etc. In the backend it also does the same task of reaching out to the QnA service and getting back the answers.
How to use
We saw what it is, and I am sure you must be curious as to how you can use this IP to deploy your own QnA bot. Lets find out!
Following steps needs to be performed in order to deploy this:
- Download the Release v1 code from here Download
- Create a GitHub repository and upload the downloaded code there.
- Ensure you have an active azure account and subscription, if not you can create one here: Create Azure Account for Free.
This wont cost you anything, since the services we will be deploying are under the free tier.
-
Add the following secrets in your GitHub repository
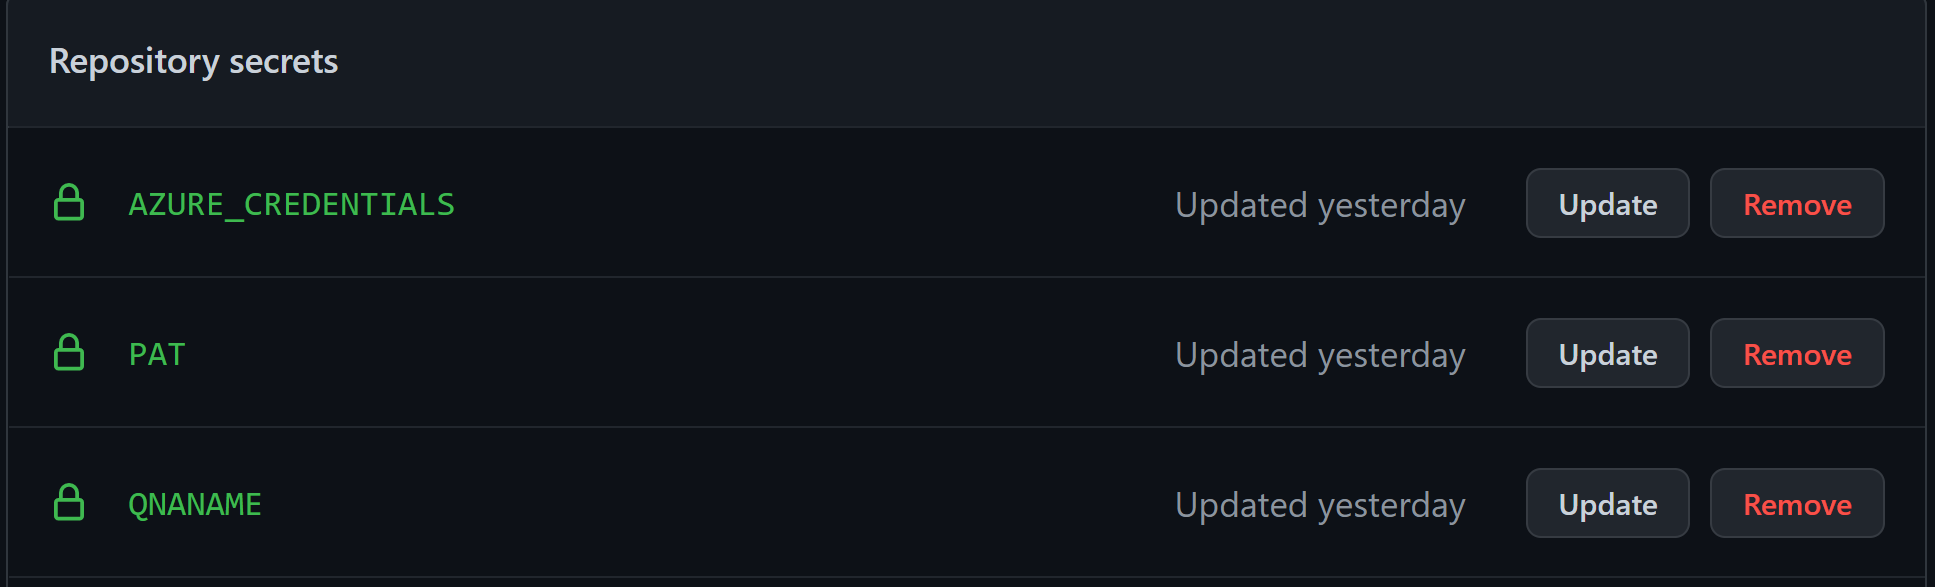
a. AZURE_CREDENTIALS as explained here: Azure Login GitHub Action
b. PAT - Create a GitHub PAT as explained here: How to create a GitHub PAT with scope as repo.
c. QNANAME - This must be a unique name across azure, to verify you can enter it here: Name verification and verify that it is being accepted.
-
Update the file under
.github > variables > qna.json. Here update the subscriptionId value to your azure subscription id, and the qnaName value to the qnaName you finalized in step 4c. -
Before you deploy the infrastructure, we need to agree to responsible AI terms on Azure. For doing this, we will just create a sample resource and then delete it. Create a Language Service with any name and then delete it.
-
Now run the workflow QnA-Infra-Deploy manually which will deploy the resources onto Azure.
-
Next, go to the folder
FAQs, and here you can update the markdown files to any question answers you wish to see your bot reply. -
Now the workflow QnA-KB-Deploy will be triggered and your updated QnA will be deployed to knowledge base.
-
You can go to the Language Portal to verify the same.
That’s it! We have out service up and running.
To test it out, you can create a new issue in the same repository, and add a comment @Bot {your question} and in about 15 seconds you should see the reply coming in!
To deploy the Azure Bot service
- Go to Language Portal.
- Open the project with the name you entered in the qnaName variable.
- Go to
Deploy Knowledge Base - Click on
Create a bot - Now follow the steps and deploy it to the resource group QnA Maker.
- [IMPORTANT] Once deployed, go to the app service plan that it created and click on Scale Up. Here change the pricing tier to F1 to avoid any charges to your account.
That’s it! We have our bot up and running. Simply go to the web app bot resource, and select Test in Web Chat. Now you will be able to test your question answers here.
Thus we saw how easy it is to deploy your customized QnA bot for free. Now that you have the base ready, you can use this to customize as per your requirements.
Youtube Video: Deploy a Personal QnA Bot for free in 15 minutes
Azure Bot Service: Azure Bot
GitHub Issues Bot: GitHub Issue Bot
Repository https://github.com/deep-mm/QnA-Service-PlugnPlay
Technology: Azure, Cognitive, GitHub, DevOps