Introduction
GitHub Apps allow you to automate and improve your workflow. You can make use of almost every GitHub REST API in the GitHub App except for the ones which doesn’t have mentioned Works with GitHub Apps in here.
In this blog, we showcase how easy it is to create a GitHub App using Probot framework, and in the second part we show how to deploy this App on Azure Functions. Stay Tuned!
Initialize & Run Probot App locally
In this section we will initialize a GitHub App with Probot and see it in action.
Initializing a Probot GitHub App requires installed node version to be greater than 10.0.0. You cam check this by using node -v command on your desktop. If needed you can always find the latest node version here: NodeJS.
-
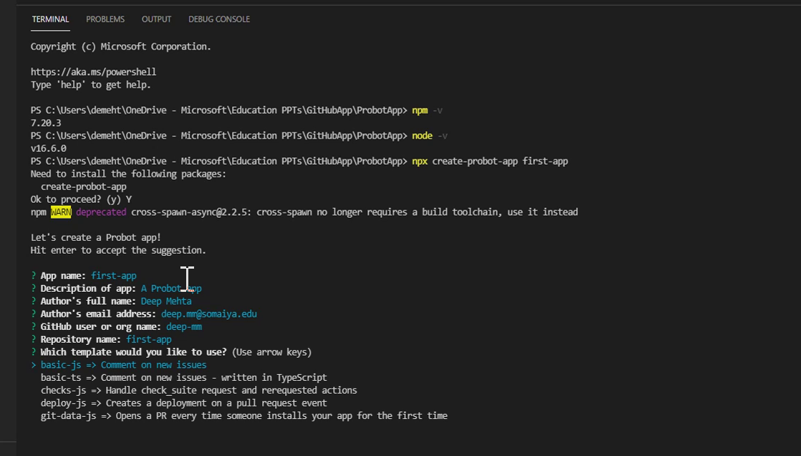
Follow the steps mentioned in the Probot Documentation
-
Once app is initialized, run the app locally by running following command
npm start -
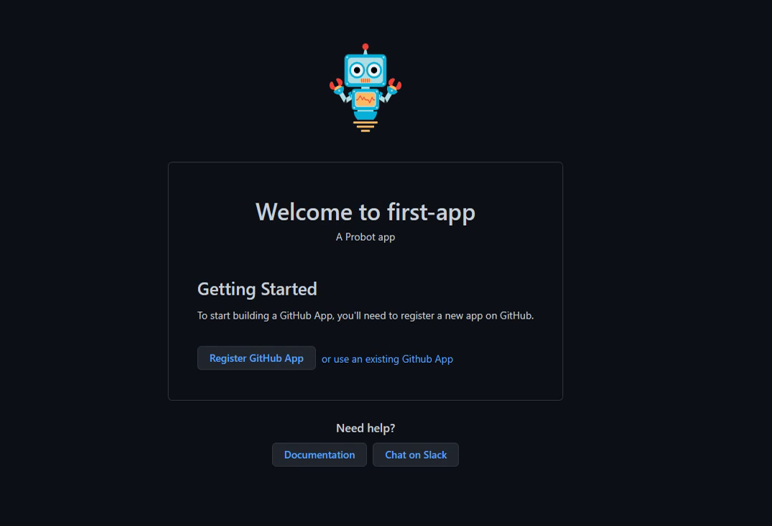
Now that the app is running, open this url in the browser http://localhost:3000/.
-
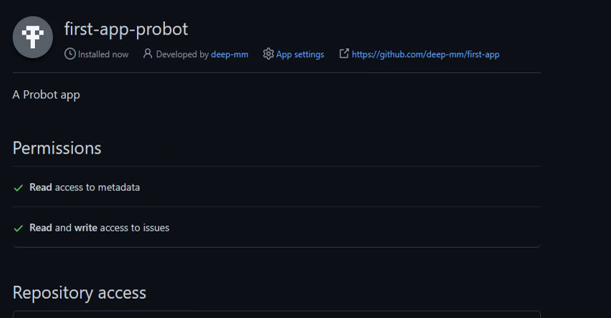
Click on Register GitHub App, select your GitHub Account and install there.
-
Now restart the server in your terminal by
Ctrl + C>Y. Then runnpm start. -
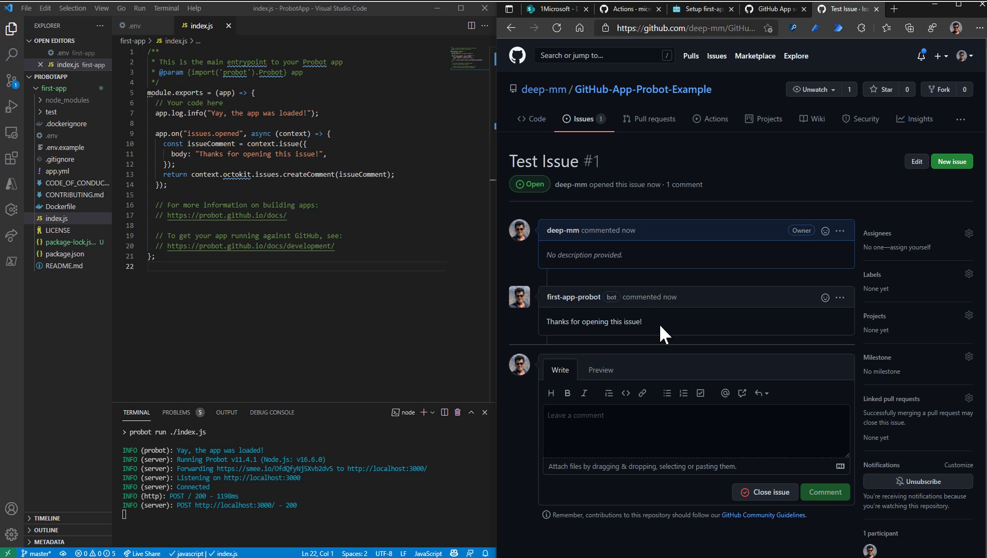
Now open any issue in your any of the repository and see an automated comment directly visible in that issue.
-
The GitHub App, most important file where all the logic is mentioned is
index.js. -
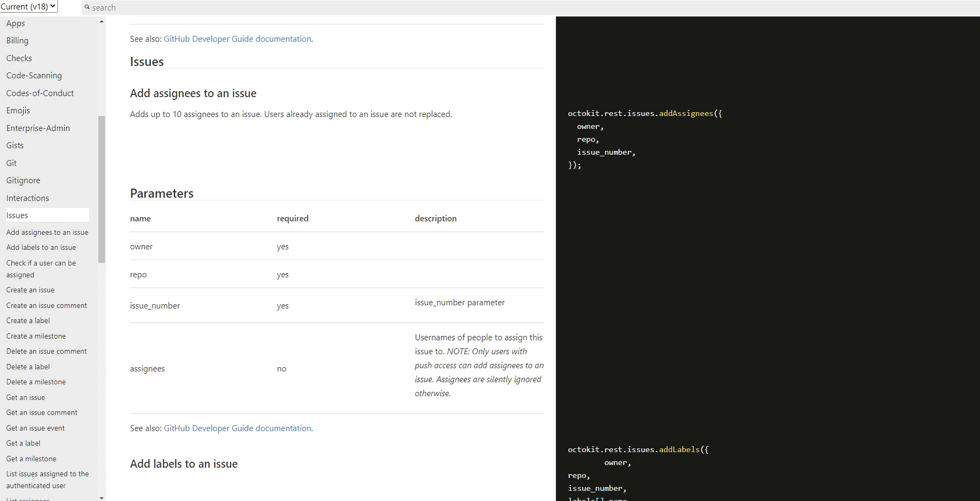
Let’s use the octokit rest api to also assign the issue to a user by default whenever it is created. This Octokit Rest API is everything you will need to experiment with GitHub Apps. This will help you automate almost everything.
-
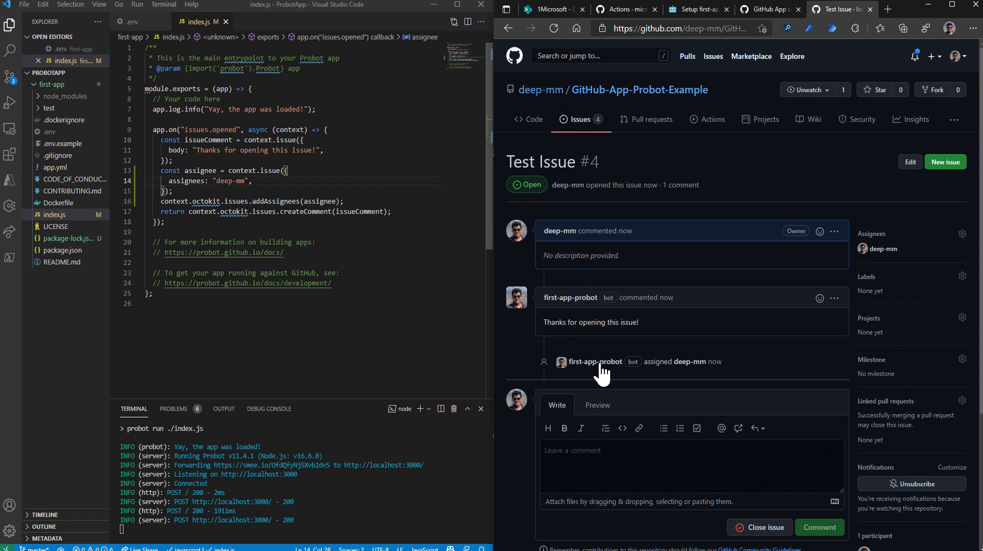
Lets add the following lines to index.js to also support assign feature.
const assignee = context.issue({ assignees: "{GitHub_Username}", }); context.octokit.issues.addAssignees(assignee); -
Once Added, restart the server and see the code in action by creating a new issue.
Deploy GitHub App on Azure Functions
In this section we will see how can we host this Probot App on Azure Functions.
-
Create a folder in the main folder called
{Your Function Name}and add 2 files within it:- function.json: Defines the function app - httpTrigger with noauth and supports POST
- index.js: Defines the initial script of function app - Initialize the Probot App defined in index.js
The content of these files will remain same irrespective of any app, so you can copy this from the repository mentioned in the Project Artifacts & Details section at the end of this page.
-
Update the package.json & package-lock.json exactly the same as mentioned in the first-app-probot repository. This has updated node packages required for the function app.
-
Create a new repository on GitHub and push this code there.
-
Create a new function App on Azure. Then configure the deployment center to connect the GitHub repository we created in step 3.
-
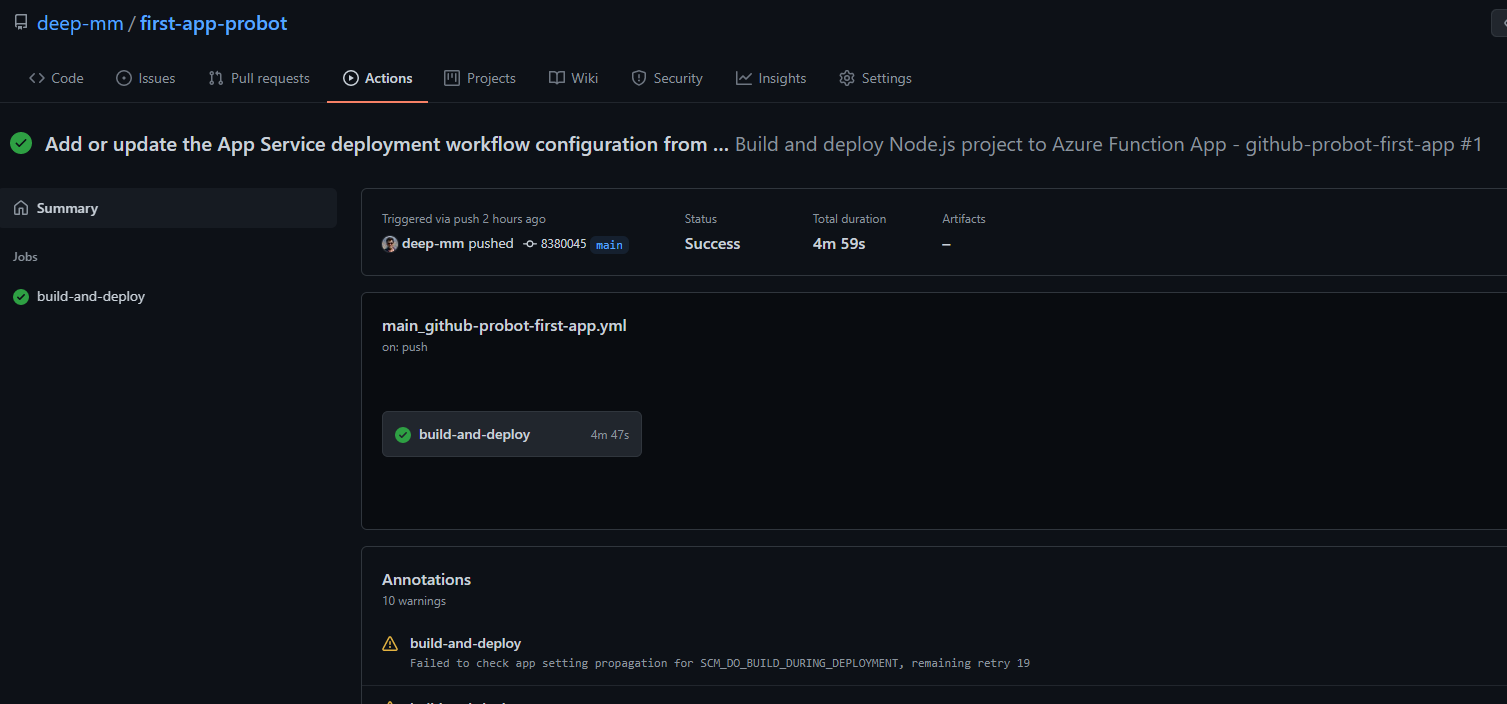
This will automatically setup the CI/CD in the GitHub Actions and deploy the Function App.
-
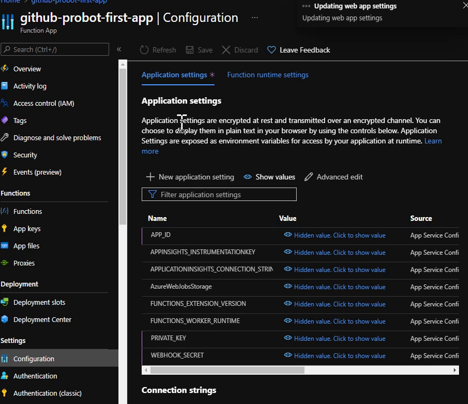
Add 3 configuration app settings in azure function app (Values will be found in local .env file):
- APP_ID
- PRIVATE_KEY
- WEBHOOK_SECRET
-
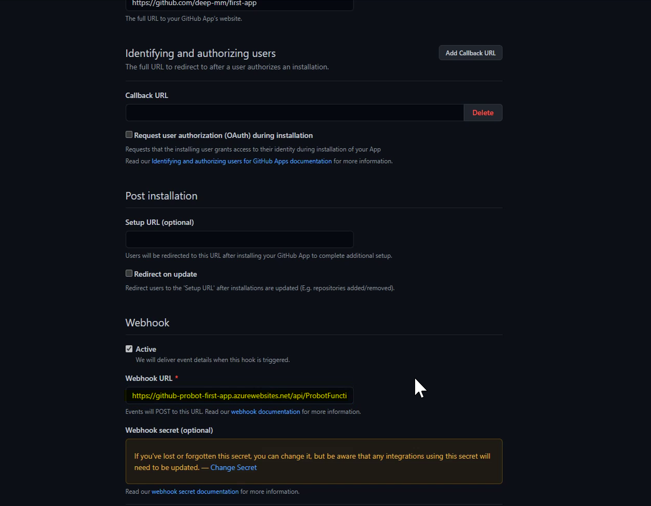
Copy the ProbotFunctionApp Url from Azure Portal. Open the GitHub App settings and change the webhook url now to this function app url. This will ensure that now whenever an issue is opened, a request will be sent to the function app and not to the old local webhook.
-
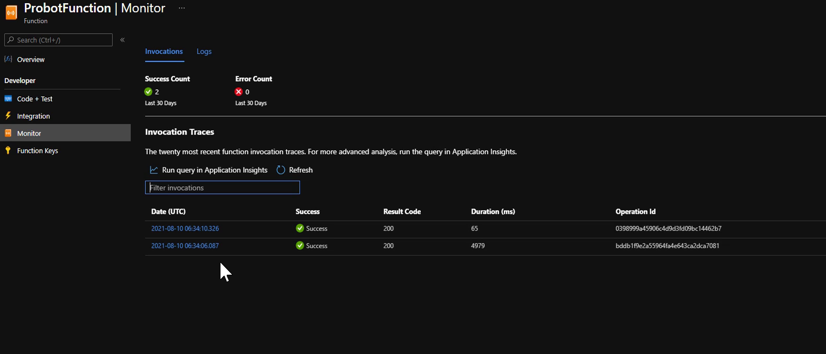
Now, if you open an issue, a request is sent to function app and we can see the issue comment as well as it being assigned.
Demonstration Video
Youtube: GitHub App + Probot + Azure Functions
Marketplace: first-app-probot
Repository (first-app-probot): https://github.com/deep-mm/first-app-probot
Repository (GitHub-App-Probot-Example): https://github.com/deep-mm/GitHub-App-Probot-Example
Technology: GitHub Apps, Azure Functions, Node, DevOps, Probot, Octokit